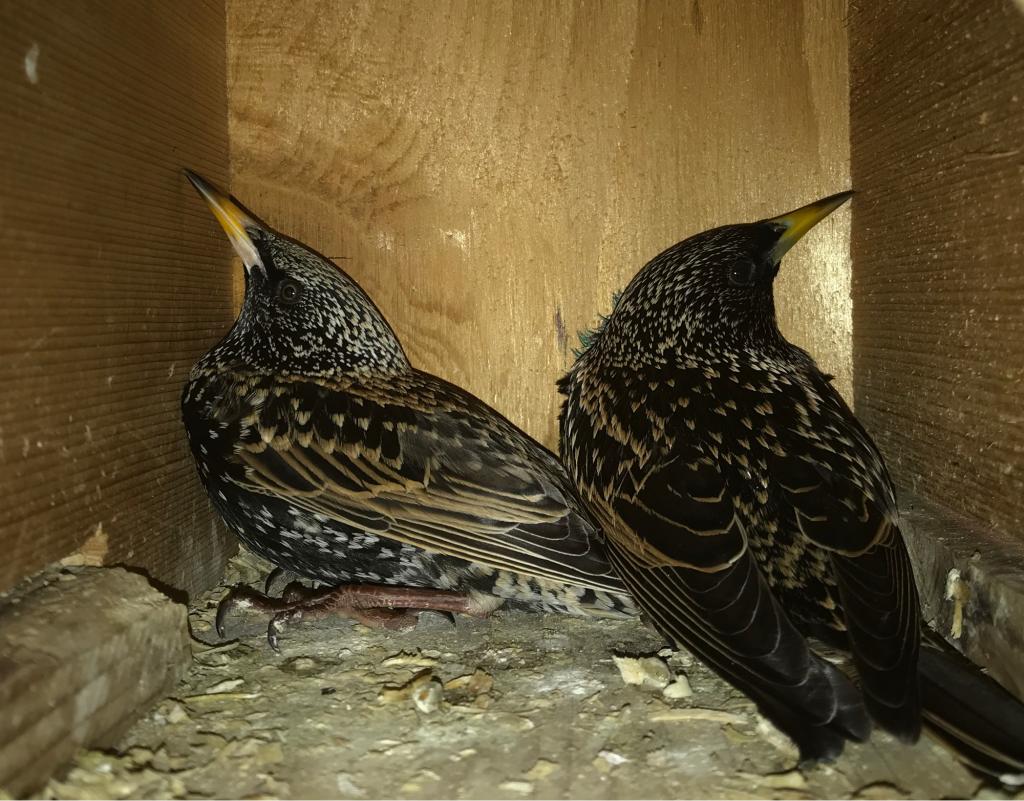
European Starlings tend to get a undeserved bad reputation. People consider them messy and annoying, and in part it’s true: They tend to be aggressive in defending their territory, in large groups they leave a lot of droppings and a flock of starlings can pick a berry fruit tree dry in an instant.
Why, then, do we love starlings so? Starlings are adaptable, adorned with beautiful colors and incredible mimics. Anyone who has hand-raised a starling can attest to the unexpected voices coming from its cage many months after hatching. They are fiercely loyal creatures, demanding both their independence and their ownership of anything they consider “mine” (hint: Just about anything they can get their beak on). Finally, from an environmental standpoint, they’re effective pest exterminators; many of the government publications on starlings attest to this singular ability to far outweigh any negatives. Those who want to get rid of them should be asking the question, “Yes, but how would this affect the local ecology?” Regardless, I digress…
When our beloved pet starling passed away, we decided that it would be a nice memorial to have some starling visitors in the yard for the summer. We do this every year in January to allow for time for the neighborhood starlings to find, claim and use their newfound nest. In order to do this, we had to figure out the best way to make a nest that would be of interest to these little darlings. At the same time, we’re constantly saddened by the number of websites dedicated to the entrapment (and subsequent extermination) of European Starlings. We simply decided to take things half-way: Built the nest, minus the trap.
Materials & Tools Needed
- Cedar board measuring at least 7 feet x 7.5 inches x 3/4 inches
- Box of screws suitable for exterior use
- Drill
- Cutting tool (bench saw, etc)
- 2″ hole saw that fits the drill
- Pencil
- Measuring tape
- Straight edge (L-shaped ruler, etc)
The Board
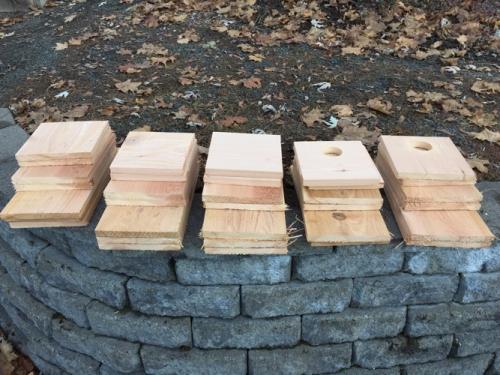
You’ll be able to build your nest from a single board. While we use cedar to make it more “weather-proof”, chances are you’ll need to replace the nest each year (starling nests tend to be messy). If you decide to paint your nest (for enhanced weatherization), you’ll be disappointed for two reasons. First, the nest will need to be disposed of each year (see below).
Second, if you do this to make it weather-proof, any seal you make will actually increase the rot and mildew that can accumulate from the inside (via bird droppings). If you must paint the nest, make certain to only paint the outside, making sure that the entrance hole will look dark from the outside (very good for attracting the birds). Divide your board up using the following height measurements and cut using your instrument of choice. Once done, you’ll have six sections with one left-over piece.
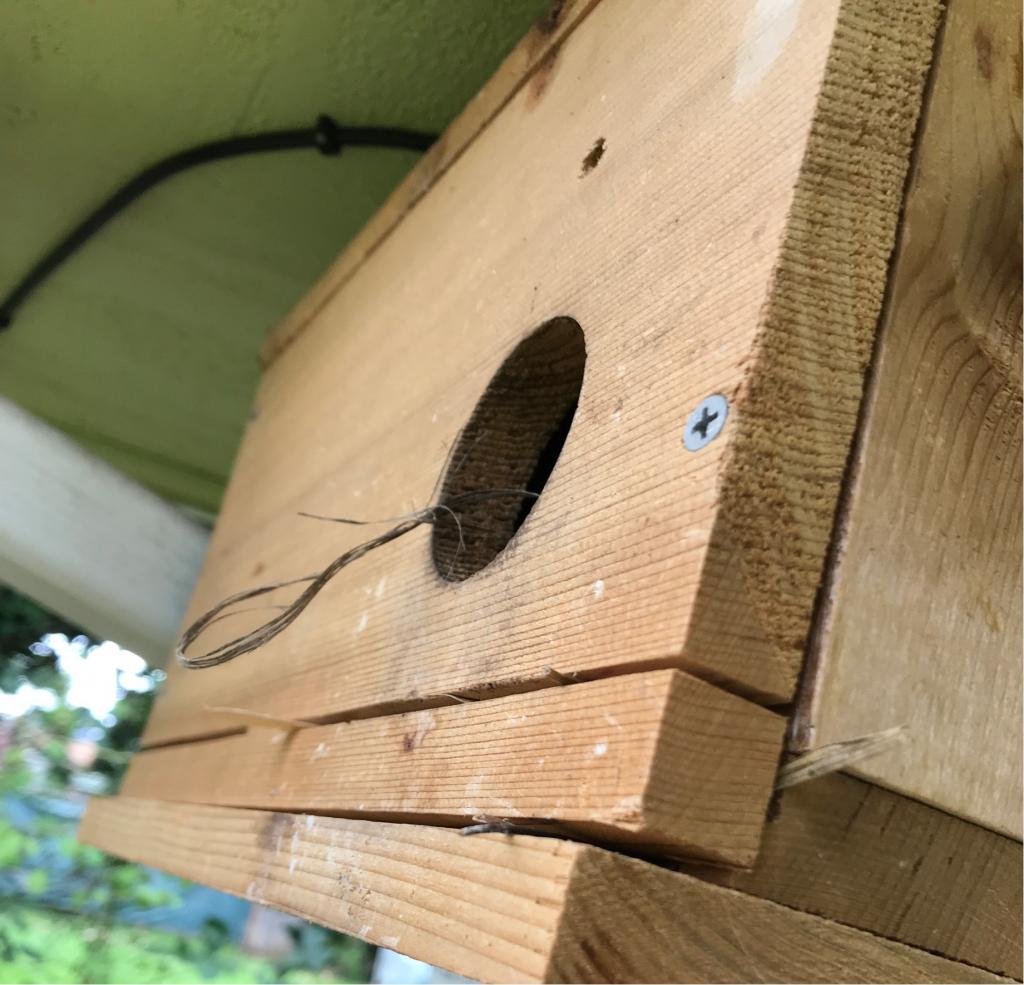
One adjustment that your starling visitors will love is making the bottom panel just as long as the top (14″) instead of 11.75″; this way, they’ll have something to perch on that’s a bit sturdier than a round dowel/peg, and you’ll get to see the starlings sit outside of their nest more often.
Measurement Note: Most boards don’t measure exactly 7.5″ wide. I haven’t the foggiest idea why. Chances are your board will measure something like 7 & 3/8″ wide. As such, this will affect your measurements for how tall to cut the front and back sides, otherwise you’ll end up with a gap on top of both sides. Granted, it’s progressive, but I’ll bet that most starlings would prefer weatherized lodging accommodations rather than a fancy side-skylight. So, here’s the (more accurate than the picture) table you should use for your measurements:
| Section | Length | Width |
| Bottom & Top Panels | 14″ | 7-3/8″ |
| Side Panels | 10.5″ | 7-3/8″ |
| Front & Back Panels | 7-3/8″ | 7-3/8″ |
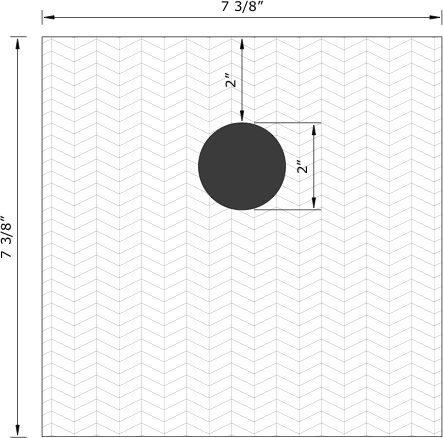
The measurements listed above as 7 3/8″ are the variable ones; if the width of your board is something strange like 7.75″, make sure to adjust those numbers to match. Otherwise, you’ll have that odd gap mentioned above. After you’ve cut out the sections of the board, drill a 2″ hole on the front panel.
The center of the hole should be 2″ from the top. Don’t use anything smaller, otherwise starlings won’t be able to enter the nest. Drill three holes on the right side of the front panel and prep three screws. You’ll need to make sure to place the right side panel underneath in order to drill it as well.
Once you’re done, you’ll have one side of the nest in the shape of an “L”. This part is intended to be removable, so we won’t be drilling any more holes into it whatsoever. Now, do the same to the left and back panel, making the opposite “L” shape. Since the left/back panel pair is not removable, go ahead and secure it to the bottom board, pre-drilling the holes to avoid splitting the wood. You should now have two functional parts of the nest.
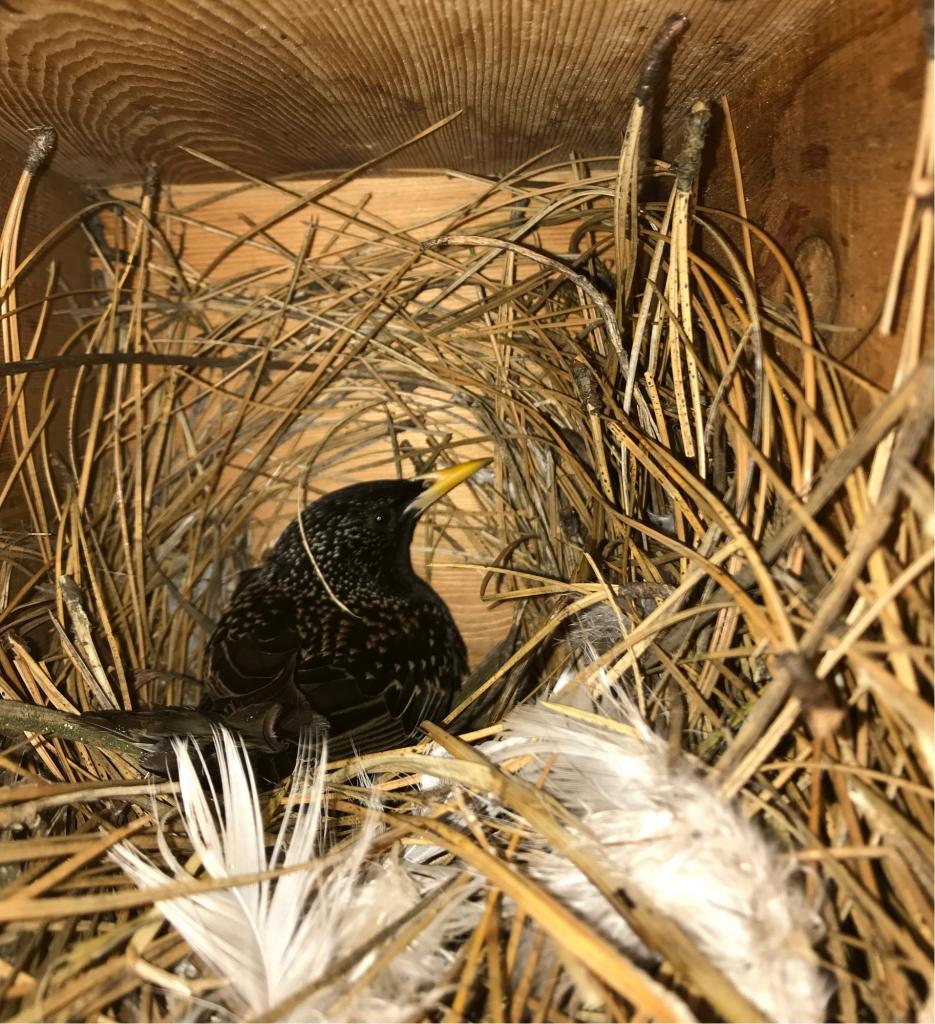
Add and secure the top panel, making sure that the extra length extends past the front of the nest. Use the front/right panel to help steady the roof as you attach it, making sure not to secure this bit as well. When you’re done, you should have two fully functional parts of the nest at your disposal. The front/right panel will be held in place by the pressure of the the top/bottom of the nest. It will actually fit nice and snug.
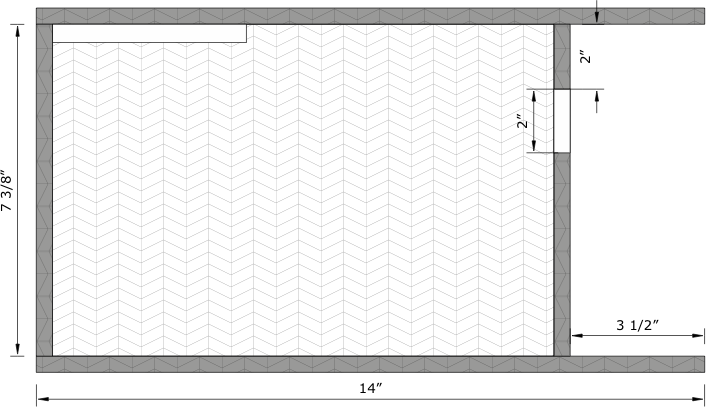
Prep the nest for attaching to its final resting location. From what we’ve seen, starlings seem to love interior corners of buildings. In our case, we’ll need to secure the nest using the back and the top. Had we thought this out differently, we could have made the left side removable, however this will suffice.
We purposefully made the removable part of the nest inaccessible to us to prevent undue prying eyes lest temptation get the better of us. Also, as starlings tend to stuff their nest full of anything they can get their beaks on, making a removable side panel can be temperamental and easily dislodged (permanently freaking out the mother bird and making her abandon her eggs should the side wall fall off; we’ve seen it happen). Attaching it in-place with a screw from the bottom is probably a good idea.
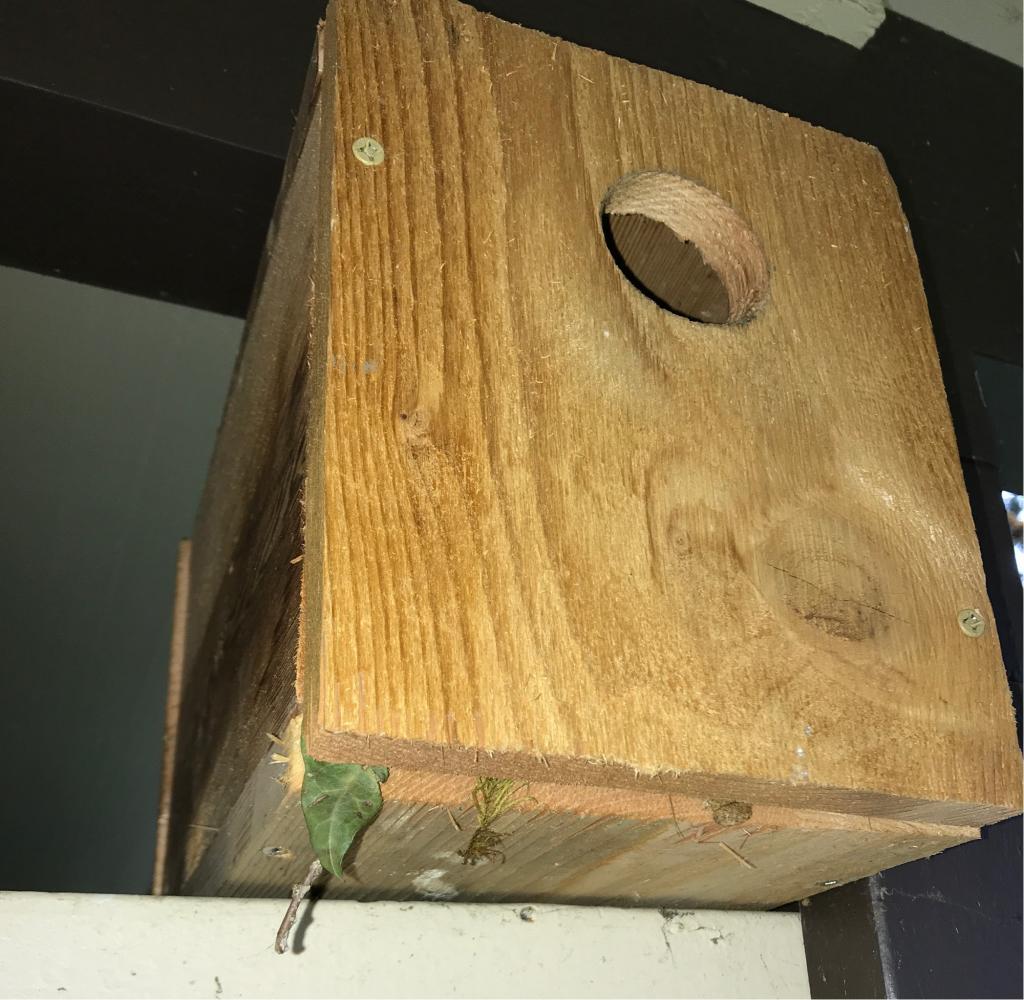
Nest Placement and Timeframe
Placing the nest in a corner near a structure is your best bet to have your nest attract lots of attention. Starlings like nooks and corners, and this is appealing to them. It may very well have to do with their nature to prefer human habitations for survival over non-natural ones; indeed, they do tend to thrive quite well by themselves.
Starlings will investigate, claim ownership of and occasionally hang out near or on the nest during most of the year. The only time they’ll actively use it is during breeding season. Here in the Pacific NorthWest, this tends to mean that our nest must be in place by February, with chicks hatching in May/June.
What to Expect
You’ve found a starling sitting near or on your nest, flapping his wings and proclaiming proudly to the world. Congratulations! A male starling has staked out his territory and is attempting to attract a female. He may have placed small twigs, flowers or other assorted items in (or often hanging out of) the nest as if to say, “this is some place I’ve got here!”
When a female joins him, she’ll promptly remove all items from the nest and redecorate it (go figure, my wife says). Once the nest is ready, she’ll start laying between 5-6 eggs at the rate of one egg per day and sit on them for the next 12-14 days until they hatch. Be careful not to be too curious as investigation of the interior of the nest will likely make the mother bird abandon the nest (along with any eggs or chicks inside).
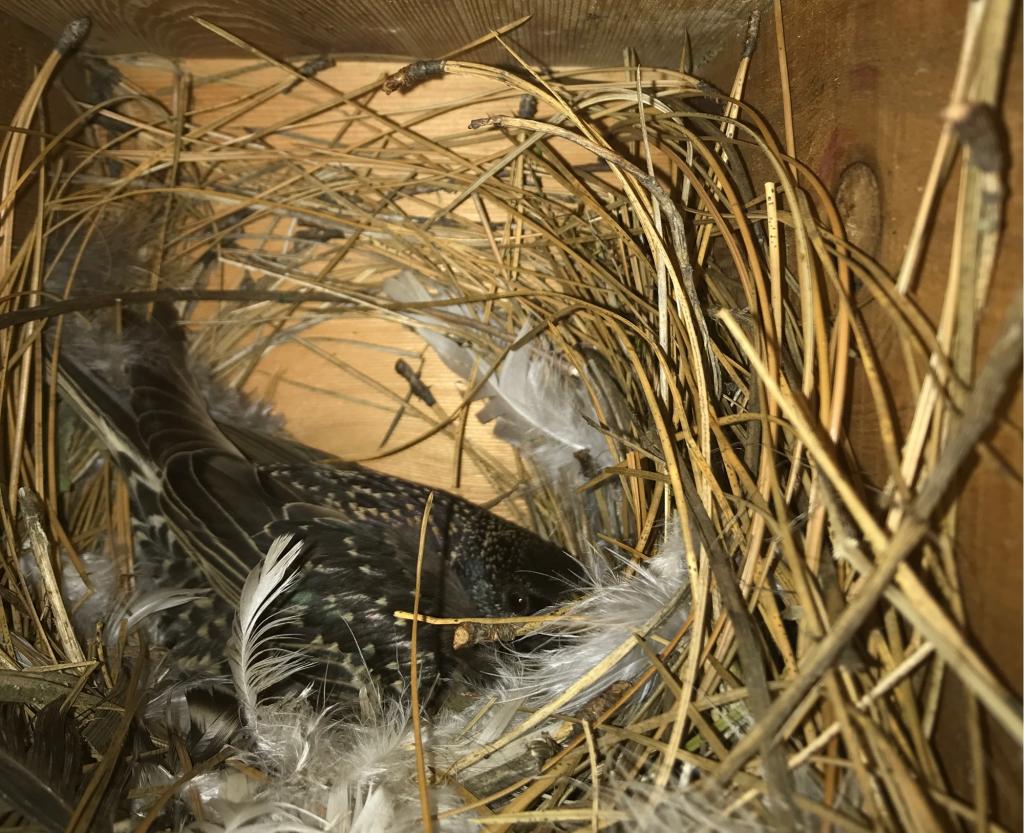
Once hatched, the mother bird will start flying out from the nest on a regular basis ever 5-15 minutes to hunt for food. As she leaves, she’ll grab the feces left over from the baby birds which are, at this age, conveniently still contained in a self-enclosed sack. As she flies off, she’ll drop the “droppings” along her path. Take note that this can affect your decision as to where to place the nest! Her job also involves staying with them to provide warmth and to feed them on a regular basis.
Where is the husband in all of this? He’s around, although he tends to stay elsewhere during the nights. Once the starlings hatch and leave the nest, you’ll need to remove the nest and dispose of it. Chances are that it’ll be covered in bugs and other assorted critters. It’s the price of starling appreciation, I’m afraid to say. We end up making at least two each year and placing them in various areas of the yard where the squirrels are less likely to go.
